Sponsors


Zero to Startup – Prototyping Your Way to an MVP
Last week we spoke about taking your idea from zero to startup.
Somewhere between “zero” and “startup” lies the prototype phase.
When I think “prototype,” one of two things come to mind: an experimental pair of shoes that Nike has just released, or a bare-bones software application with limited functionality.
Depending on your industry, prototyping can take many different forms. But for the sake of brevity, let’s assume that you’re developing a SaaS app.
Without a doubt I’m preaching to the choir when I say this, but nevertheless, here goes nothing: people in the software industry can learn a whole lot from Eric Ries’s “The Lean Startup.”
Among other things, The Lean Startup places a focus on building out your Minimum Viable Product (MVP) in as little time as possible, and one of the fundamental principles backing this idea of a quick MVP is this: “Build, Measure, Learn.”
The idea behind the “Build, Measure, Learn” principle is that by building a prototype and quickly pushing it to your audience – subsequently receiving feedback, iterating, and doing those steps all over again – you’ll relatively quickly arrive at a MVP that is in sync with your market.
Of course every product is different, every market is different, every team is different, and every startup strategy is different. That being said, there are a number of core steps that entrepreneurs use to get their MVP up and running to ultimately arrive at their ideal product/market fit in a timely manner.
And here they are.
The First Prototype: A Hand-drawn Illustration
Hand-drawing illustrations of your initial prototype gives you the complete creative freedom of design. Even if you’re a horrific artist like myself, you’ll be amazed at the ideas that can bubble up when you’ve got some inspiration and a blank piece of paper.
Before you begin coming up with creative ideas on how you want to design your product, consider this: what’s the core functionality behind your solution? What’s the one feature you know (or you think) your customers can’t live without? This will ultimately drive the product’s design.
Choose 3-4 pages that are absolute must-haves – those that are parts of the core functionality and that will be required in order to develop a “working” prototype in the near future. Nathan Barry, the author of the App Design Handbook, always has great insights on prototypes, wireframes, app design, marketing etc. To give you an idea of what a hand-drawn prototype looks like, check his sketch out:

Quick tip for starting out: take bits and pieces from successful companies with proven track records and combine them to form what you believe to be an ideal design. For example, if you’re building a visually-based small-team project management app, the inspiration for your design could come from the following sources:
- Google’s calendar
- Asana’s commenting mechanism
- Trello’s Kanban boards
- Your competitor’s [insert feature]
Don’t spend more than a few hours during the initial brainstorming and sketching session for your prototype.
Something to remember: today, the success of a software application is as much about the look and feel as it is about the functionality.
Something else to remember: as you do more market research you’ll become more and more aware of your competitive differentiation – the driving force behind your design – and your design will inevitably change again and again.
The Second Prototype: The Wireframe
In an episode of the “Startup” podcast (or search for “Startup” on whatever podcast app you use), a guest from Google Ventures’ team talked about how to validate an idea through the use of a prototype. He advised that, instead of first building a functional prototype, begin by designing wireframes of the user interface (UI). These wireframes should convey your product’s proposed functionality and use case(s).
You’ve already done a few sketches of the prototype, so you’ve got a good idea of what the wireframe needs to look like.
By undergoing the sketch and wireframe phases before coding anything, you’re streamlining the process and saving yourself from tons of future headaches from a coded design that just isn’t right. So design now, code later – you’ll position your product to be better aligned with the market when you begin coding.
If you’re a graphic designer or a wireframe expert, skip the next section. But assuming you’re not making the wireframes yourself, you can break this process down into four phases:
Phase 1: The wireframe design
Remember, the purpose of this wireframe is to highlight your product’s ONE killer feature. What’s the pain your software soothes? That is what you’re emphasizing. You’re going to need 3-4 pages of professional-grade wireframes to give your users an idea of exactly how your product will work.
Andrew Chen calls this going for a “Minimum Desirable Product.” He suggests spending no more than two weeks on this phase. That may seem a little rushed, but the quicker you design it, the faster you’ll be able to get constructive criticism and return to the drawing board with version 2.0.
Here’s an example of a few pages of a basic wireframe for an app:
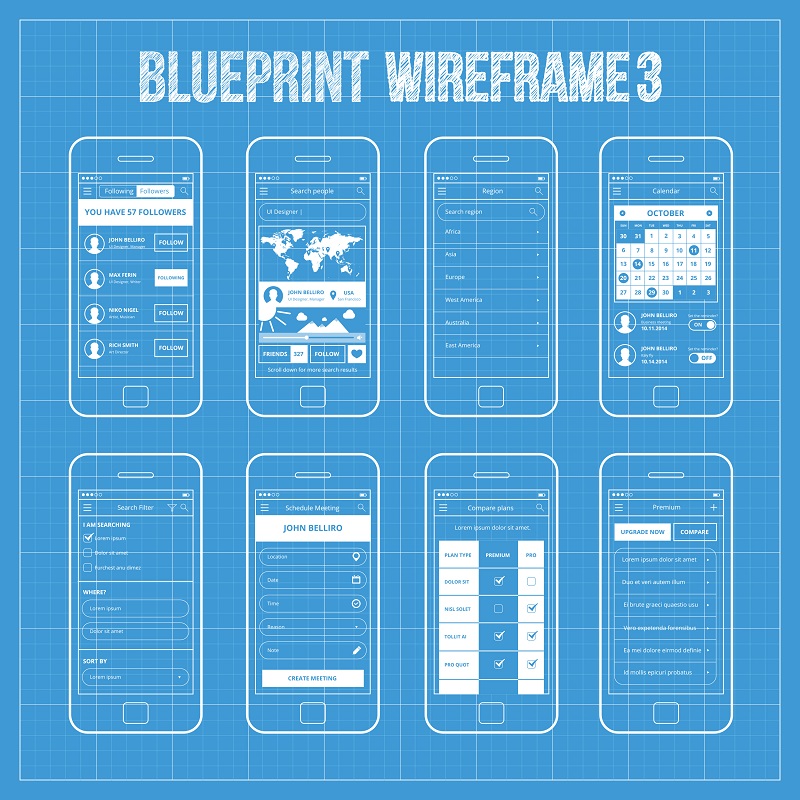
As long as you’ve got a killer design with an intuitive UX, users won’t have a hard time conceptualizing your product’s use case.
Phase 2: Bringing the design into reality
Experienced designers have learned the constraints of the market and are aware of what works and what doesn’t. The best designers will work with you to come up with something that’s both feasible and functional.
It’s relatively easy to find qualified freelancers willing to do a wireframe mockup at a reasonable price. Just be sure they’ve done similar projects and are accustomed to working within your market.
- Inside your own network. If you’ve got family, friends, or friends of friends that live in your area and fit the job qualifications, approach those people first. As a general rule, it’s best to work on creative-type projects in-person rather than communicating via Skype and illustrating your ideas on Google Draw (these types of projects easily get “lost in translation”).
- Outsourcing. If no one in your own network fits the description, try out some freelancing platforms. I’ve had great experiences working with graphic designers on eLance. Also give Craigslist a try – I can’t count the number of success stories I’ve heard from people finding just the right person for the job, located in their area, on Craigslist’s job boards.
- Use a wireframing SaaS app. Nowadays, there are SaaS apps that let you create mock-ups all by yourself. No graphic design skills required. Check out this blog postfor a big list of some of the best.
Phase 3: Getting feedback on your wireframe
Pass the wireframe around to everyone and anyone who’s interested.
While you’re conducting your market validation research (as discussed in the last article), you’ve likely come across hoards of individuals and communities who embody your product. Reach out to these people – let them know you’ve got something you think they’d be interested in looking at.
If you don’t get enough interest from these communities, reach out to people in your own network. Friends, family and people who you don’t like but are in your life for whatever reason.
The sheer amount of feedback you get is very important – the more the merrier.
But also consider who your feedback is coming from. If it’s from your friends who know nothing about UI/UX, don’t feel bound to their word – especially if they also do not fit the description of your ideal customer.
But if you posted a blurb on a reddit community and redditors are unanimously telling you to change something, you should definitely at least look into heeding their advice.
The more people you reach out to, the more information you’ll have to pour over, organize and act on. To make it easier, I’d suggest using some sort of feedback form. Here are a few I’ve used and liked:
- Google forms – Very simple. Very free.
- 123 Contact Form – Versatile. Free and paid options.
- Wufoo – Great drag & drop builder. Tons of integrations.
Phase 4: Iterating
Once you’ve got some actionable feedback, go back to the drawing board for another iteration.
Then do that again. You need to make sure you’ve got a design and an experience that the people love before you pour even more time and energy into coding.
The Third Prototype: Coding the Initial Minimum Viable Product
Once you’ve received a few rounds of feedback on your wireframes, begin coding your initial product.
Here’s the coding stage, broken down into 4 major steps.
Step 1: The design for your MVP
The flows and elements associated with your features must take priority over all other features.
All too often founders get caught up in the nitty gritty details – perfecting design, clarifying copy, fixing bugs. Those worries should come later. First you’ve got to verify that people actually want to use your solution – then worry about everything else.
Step 2: Finding your developer
As was the case with finding a designer for your wireframes, first look inside your own local network. Friends, friends of friends, acquaintances, people you’ve met at networking events, and whoever else in your region that may fit the description.
If your own network isn’t ideal , look online. Here’s a few popular places to find developers:
- Elance – Tons of people will fit the description and will apply for your job. Make sure you choose your candidates carefully.
- /r/ForHire – a subReddit in which entrepreneurs are either looking for work or looking for workers
Step 3: Get it in the hands of users
“Build it and they will come” – for a baseball field in a movie, that may be the case. But if you’re developing an app, you’re gonna have to seek them out.
On the plus side, since you’ve already done a ton of market research, you’ve probably got a very good grasp on where your users hang out, plus you’ve reached out to a number of them in prior stages of prototyping. Now it’s time to recruit more and get them to test out your product.
Let’s take a look at the following sources:
- Users in the existing market – People using competing solutions to your own, people who’ve participated in discussions in the market, etc.
- Rejectors – Users who’ve been dissatisfied with competing solutions and are looking for alternatives.
- Outside the market – People in other markets that you know could find your solution useful.
- Extreme users – Someone who does not fall within your proposed target market. They could be a different age, with a different background, from a different country. The idea is that an extreme user will give you extreme feedback; feedback that may very well be outside the scope of your project, but that may nonetheless be highly valuable.
- Forums – Quora, Reddit, etc.
- Family and friends – They’re always willing to help. Never shy away from asking them for their feedback.
Some questions you’re looking to get answered:
- Do you get it?
- How would you describe it to a friend?
- What’s the best part about it? What’s the worst part about it?
- If you’re a user in an existing market, would you make the switch?
Step 4: Collecting Feedback, Iterating, and Tweaking your MVP
You’ll know when you’ve collected enough feedback because you’ll be back at the drawing board with a lot of things to do.
The purpose of this iterative phase is not necessarily to add new features, but rather to:
- Clean up the experience
- Validate the core design intention
Final Thoughts
Think of building your prototype as the first step to getting something that works into the hands of potential users. When you start getting people to interact with your app and exchange something of value (e.g. their time, attention, money), then you know you have a product with an ideal P/M fit that’s on its way to being indispensable.
Had a different experience in your prototyping journey or want to share some sound advice? Reach me at danny [at] discovercloud [dot] com, or start the discussion below.
Recent Stories


Sales and Marketing leading tools


Top DiscoverCloud Experts


Featured Products


Compare Products
Select up to three two products to compare by clicking on the compare icon () of each product.
{{compareToolModel.Error}}
{{CommentsModel.TotalCount}} Comments
Your Comment